Check out how the
OBD-bridge multitool works
Below you can find the steps to setup the OBD-bridge multitool.
Step 1
Note: when you choose to use a LAN connection you can go to step 5.
- Connect the 16-pin OBD connector of the OBD bridge to the OBD port of any vehicle.
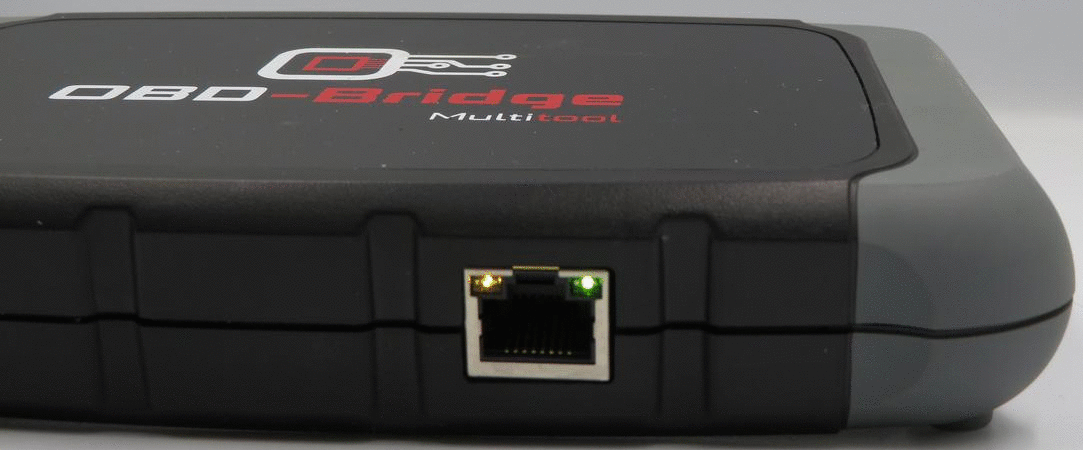
- A few seconds after connecting, the orange LED at the top-left corner of the ethernet port, will light up constantly. The OBD-bridge hardware is ready.
Step 2
- The green LED at the top-right corner of the ethernet port will start to flash slowly (900 msec on / off). The OBD-bridge WiFi module is online and ready to pair with a network.
- Search with your PC, laptop, tablet or smartphone via the WiFi settings for the OBD-bridge and connect.
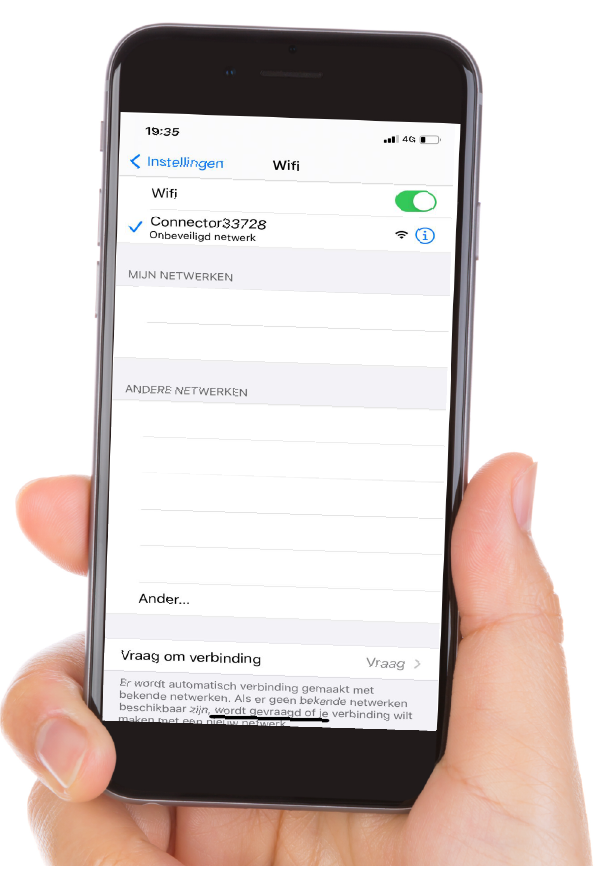
Step 3
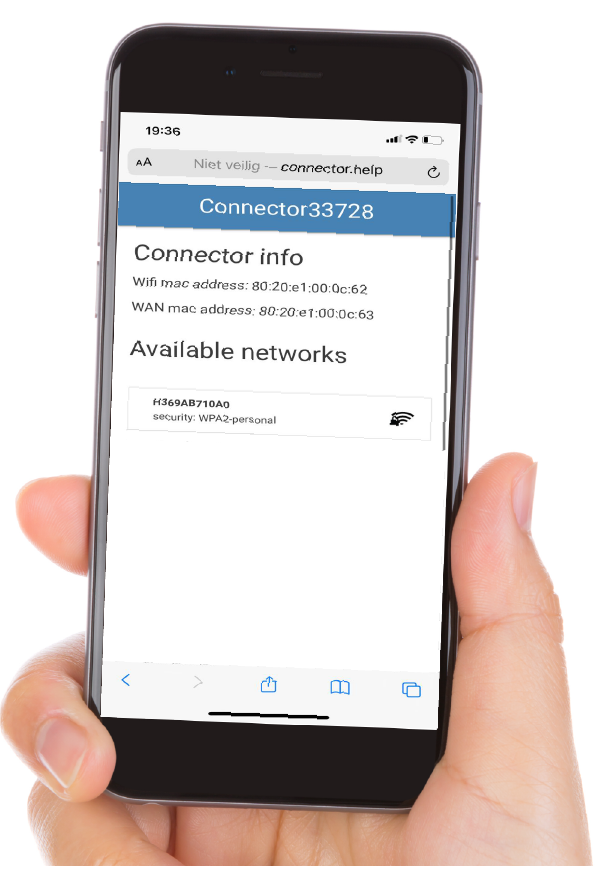
- Go with the browser of your PC, laptop, tablet or smartphone to connector.help and link the OBD bridge to the desired one network.
- The green LED blinks quickly (300 msec on / off): the WiFi network is set up and the OBD-bridge tries to connect.
- The green LED will blink faster (100 msec on / off): The OBD-bridge is connected with the WiFi network and tries to connect to the remote server.
Step 4
- Once the green LED is on constantly, the connection is successful.
- Congratulations! The OBD-bridge is ready to use now.
Step 5
Note: the obd-bridge must be connected on a vehicle. Without a car there is no communication possible.
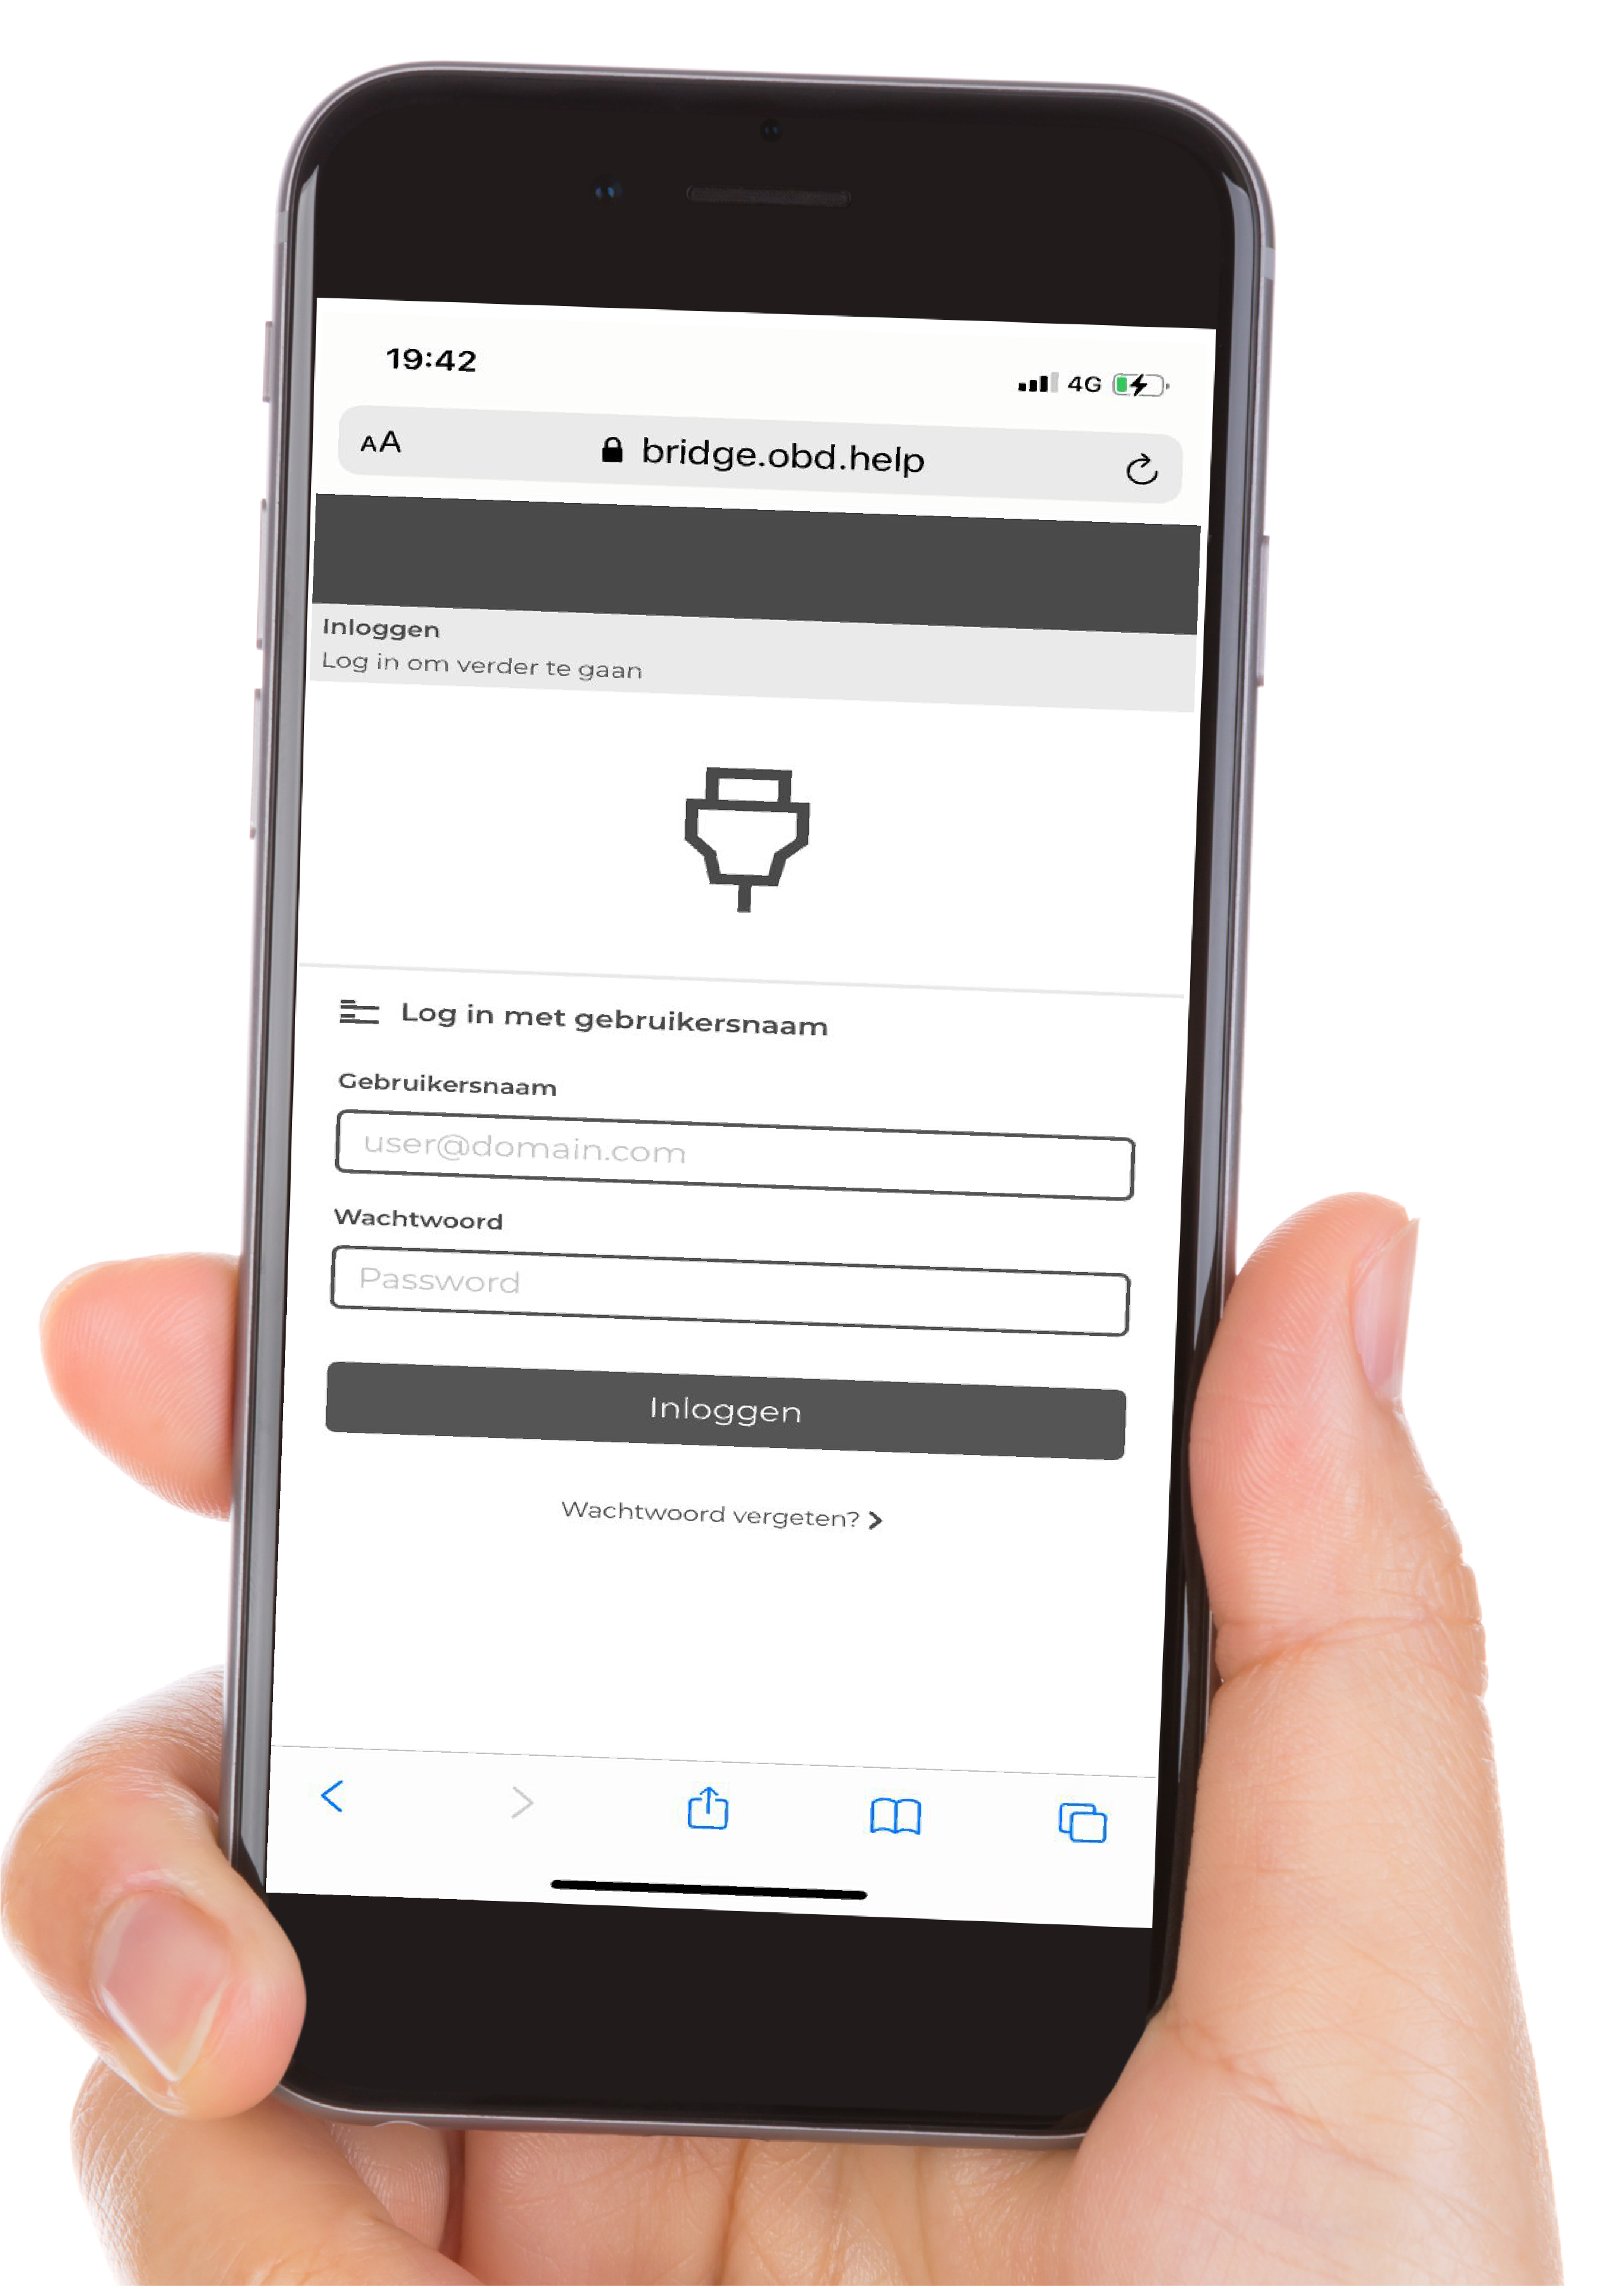
- Use the browser of your PC / laptop, tablet or smartphone to: obd-bridge.obd.help and use the login credentials you recieved by email to log in.
- Make a choice in the menu for the service you want to have performed and follow the further steps.
Troubleshooting
- When the green led on the OBD-Bridge is blinking it means that there is not internet connection.
- If you have changed the wifi pasword in your workshop (reset the obd-bridge on the back with small pin and reconnect from step 1, how to connect wifi).
- If none of these steps help, contact us.